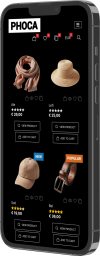
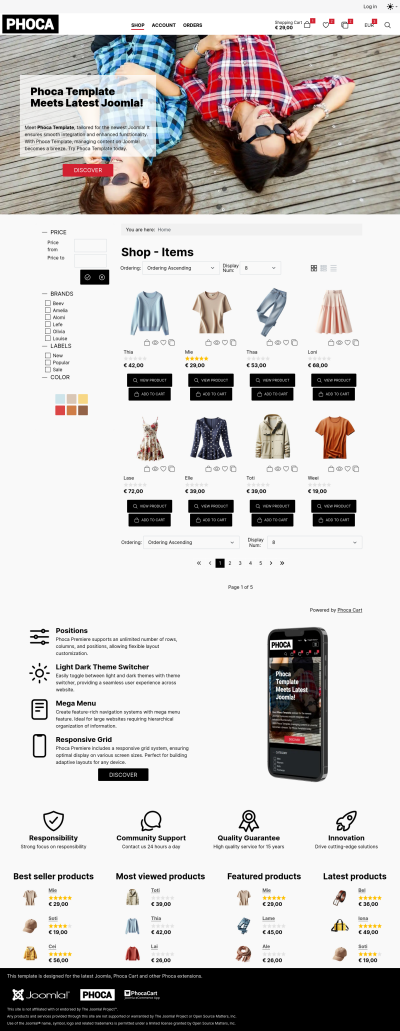
- The first contains demo data in the form of modules (Phoca Particles module) that are independent of any other extension.
- The second contains demo data for an ecommerce project. If you have Phoca Cart installed, you can use this package to quickly install products, categories, etc.


Phoca Premiere demo website

I would like to share with you my findings and brief review of the new book Developing Extensions for Joomla! 5 by Carlos M. Cámara Mora. This will not be a long and competent review, but rather a very brief look at the book. If you are interested in extensive data, such as chapter lists, etc., you can find them on the website for this book: Developing Extensions for Joomla! 5.
First of all, it is worth mentioning that publishing a book in the field of technical literature is not easy in these rapidly changing times, and I would like to express my great admiration for the author.
This book is dedicated to the development of extensions for Joomla! and it is good to realise that a whole major version of the Joomla! system (Joomla! 4) was sacrificed in order to completely modernise the whole system, which brought a lot of negatives for Joomla! 4. It succeeded and we have a new version here - Joomla! 5, which has had this turbulent evolution and brings stability to Joomla!, but most importantly, a modern system.
And that modern system deserves a book. This book will help not only new developers who are not familiar with the Joomla! system, but also experienced developers who will be rewriting their extensions for this modern system.
Personally, I was very pleased with the division of logical units into individual chapters. The big chapter on component development has been split into backend and frontend. And the development of plugins and modules has also been divided into separate chapters. One of the most successful Joomla! libraries has also been given a chapter of its own, namely Forms. The additional chapters on Web Service API and CLI are also important. Everything is rounded off with very important chapters such as Template Overrides and Child Templates. Of course, the book includes a complete guide on how to develop extensions, so there is also a guide on how to distribute extensions, and there are also security practices, which is very important.
Although I haven't read all the chapters yet, I have to say that the book is very easy to read, everything is explained very well and simply. The author gets straight to the point, doesn't distract you unnecessarily and concentrates on the topic at hand.
So what can I say in conclusion? If I had to rate the book, I would give it the highest rating. If I were to recommend the book, I would recommend it to complete newcomers to Joomla! extension development, as well as established developers who need an explanation of the new modern techniques used in Joomla!
But most of all, I would like to thank the author for this book, which only underlines the fact that the Joomla! system, thanks to its modernisation, has once again become an interesting system for developing web applications.
Thank you very much.
Book Website: Developing Extensions for Joomla! 5
Phoca - Inkscape Save As extension is an Inkscape extension which allows you to export your image(s) to JPG, WEBP, AVIF or PNG format. As default, Inkscape can export images to PNG but there is no option to export them to JPG or WEBP format. Inkscape can already export images to PNG, JPG and WEBP by default. It does not yet have support for AVIF. This extension works a little differently than the default feature and allows:
- Full page export
- Selection area export - area of selected object(s) will be exported
- Custom area export - area of manually added coordinates will be exported.
There exist two GitHub projects that deal with the export of Inkscape images to JPG format but both are not more up-to-date for the newest Inkscape version.
Phoca - Inkscape Save As extension is inspired by both projects. It uses some code from both projects which was transformed to new Inkscape API and adds new options.

With Phoca - Inkscape Save As extension you can export images to JPG, WEBP, AVIF or PNG format. There are three options:
- Full page export
- Selection area export - area of selected object(s) will be exported
- Custom area export - area of manually added coordinates will be exported.
When using this extension, be aware:
- This extensions requires ImageMagick library installed on your system
- If the selected file has a different extension than the selected format then the file will be automatically renamed and may overwrite any existing file
- Current files are overwritten automatically, there is no warning
- When using the selection method, for more accurate and faster results, it is recommended to create one object that covers the area of all other objects, and only select this object when exporting.

How to install this extension:
Just follow Inkscape guides for installing Inkscape extensions (download the ZIP package and unzip it to Inkscape extension folder and restart Inkscape)
Possible issues and solution:
- If you get error message that your system does not have Imagemagick library installed, there is no other option, this library needs to be installed
- If you get error message regarding missing Python libraries, such needs to be installed on your system (e.g. if distutils library is missing on your linux system, just install it with "sudo apt-get install python3-distutils"
- If you get error message regarding fragments (objects) when using selection method, for example: "Element fragment does not have a document root!" or similar, then just create one object that covers the area of all other objects, and only select this object when exporting.
Developers often require the ability to run multiple PHP versions in their development environment. This article provides a step-by-step guide on setting up a LAMP stack (Linux, Apache, MariaDB, PHP) with multiple PHP instances on Ubuntu/Kubuntu 23.10 Linux in the year 2024.
In order to have multiple versions of PHP running simultaneously on Apache, you need the fcgid apache module, which helps us run PHP scripts using FASTCGI. At the same time, it can then run these scripts using different PHP versions. And we do this by creating a virtual host for each PHP version.
Install PHP 7.4, 8.2, 8.3
Prerequisites
Before beginning the installation process, ensure that your Ubuntu/Kubuntu system is up to date by running the following command:
sudo apt updateInstalling Apache
Start by installing Apache version 2:
sudo apt install -y apache2 apache2-utilsCheck if the Apache service is running:
systemctl status apache2
Verify in your browser:

Since we'll be doing development, we'll set the rights and ownership for the server root folder right away (user: jan, group: jan):
sudo chown jan:jan /var/www/ -RInstalling MariaDB
Proceed with the installation of MariaDB:
sudo apt install mariadb-server mariadb-clientAs with Apache, we can check if the service is running:
systemctl status mariadb
Now we will perform the initial setup of MariaDB, mainly setting the password for the root user. Run the following command and follow the questions:
sudo mysql_secure_installationFor example:
Switch to unix_socket authentication? ... Y
Change the root password? ... Y
Remove anonymous users? ... Y
Disallow root login remotely? ... Y
Remove test database and access to it? ... Y
Reload privilege tables now? ... Y
Installing Multiple PHP Versions
And now we will install multiple instances of PHP. There will be two oddities:
1) to avoid conflicting PHP libraries, we will uninstall all the PHP libraries already installed.
sudo apt-get remove 'php*'
sudo apt-get purge 'php*'
2) Add a new specific repository to our system that will allow us to install the latest PHP versions
sudo apt install software-properties-common -y
sudo add-apt-repository ppa:ondrej/php -y
sudo apt update && sudo apt upgrade
After that, let's move on, install the apache module fcgid:
sudo apt install libapache2-mod-fcgidAnd proceed to install PHP versions (along with PHP we list various modules here, go through the list of modules and you can delete the modules that are listed here and you don't need them)
PHP 7.4
sudo apt install php7.4 libapache2-mod-php7.4 php7.4-common php7.4-mysql php7.4-cli php7.4-opcache php7.4-readline php7.4-phpdbg php7.4-fpm php7.4-cgi libphp7.4-embed php7.4-xml php7.4-xmlrpc php7.4-curl php7.4-gd php7.4-dev php7.4-imap php7.4-mbstring php7.4-soap php7.4-zip php7.4-intl php7.4-ssh2 -yOpen and edit following file: /etc/apt/sources.list.d/ondrej-ubuntu-php-mantic.sources
Change string "mantic" to "jammy"
then update the repository information:
sudo apt updateAnd then we can install version 7.4 or 8.3.
So we run the PHP 7.4 installation again (don't run it if everything was fine before).
And let's see an example of another problem, it may be that some library is in conflict, e.g:
The following packages have unmet dependencies: php7.4-intl : Depends on: libicu70 (>= 70.1-1~).
In such cases, you have to search the Internet for a solution and resolve the conflicts separately, in our case for the library: php7.4-intl we resolve them by reinstalling libicu70:
wget http://ftp.osuosl.org/pub/ubuntu/pool/main/i/icu/libicu70_70.1-2_amd64.deb
sudo dpkg -i libicu70_70.1-2_amd64.deb
And now, for the third time, install PHP 7.4 (don't do it if you managed to install it successfully before).
PHP 8.2
sudo apt install php8.2 libapache2-mod-php8.2 php8.2-common php8.2-mysql php8.2-cli php8.2-opcache php8.2-readline php8.2-phpdbg php8.2-fpm php8.2-cgi libphp8.2-embed php8.2-xml php8.2-xmlrpc php8.2-curl php8.2-gd php8.2-dev php8.2-imap php8.2-mbstring php8.2-soap php8.2-zip php8.2-intl php8.2-ssh2 -yPHP 8.3
sudo apt install php8.3 libapache2-mod-php8.3 php8.3-common php8.3-mysql php8.3-cli php8.3-opcache php8.3-readline php8.3-phpdbg php8.3-fpm php8.3-cgi libphp8.3-embed php8.3-xml php8.3-xmlrpc php8.3-curl php8.3-gd php8.3-dev php8.3-imap php8.3-mbstring php8.3-soap php8.3-zip php8.3-intl php8.3-ssh2 -yWe can check if all PHP instances are installed:
ls -la /var/run/php/The fpm service takes care of running all PHP instances. Before we start it or check its status, let's modify the user so that PHP scripts have the ownership and rights of the same user who creates folders on the server and uploads files to them.
Open and edit the following files, replace all occurrences of "www-data" in these files with the user (and group) name, in our case it is "jan":
/etc/php/7.4/fpm/pool.d/www.conf
/etc/php/8.2/fpm/pool.d/www.conf
/etc/php/8.3/fpm/pool.d/www.conf
Now start the fpm services (restart them if they are running):
sudo systemctl restart php7.4-fpm
sudo systemctl restart php8.2-fpm
sudo systemctl restart php8.3-fpm
By running the following command we can check the status of the service (e.g. for PHP 8.3)
sudo systemctl status php8.3-fpm
Let's enable some necessary apache modules:
sudo a2enmod actions fcgid alias proxy_fcgi rewriteRestart Apache:
sudo systemctl restart apache2Create Virtual Hosts
Now we will create virtual hosts, for all PHP versions we will create our own file in the folder:
/etc/apache2/sites-available/
we create the following files:
site74.test.conf
site82.test.conf
site83.test.conf
Each of them will contain the following instructions (PHP 8.3 example):
<VirtualHost *:80>
    ServerAdmin Site
    ServerName  site83.test
    ServerAlias www.site83.test
    DocumentRoot /var/www/site83.test
    <Directory /var/www/site83.test/>
            Options FollowSymLinks MultiViews
            AllowOverride All
            Order allow,deny
            allow from all
            Require all granted
    </Directory>
    <FilesMatch \.php>
        SetHandler "proxy:unix:/var/run/php/php8.3-fpm.sock|fcgi://localhost/"
    </FilesMatch>
</VirtualHost>
Once we have these files created and saved, then we enable all the pages:
sudo a2ensite site74.test.conf
sudo a2ensite site82.test.conf
sudo a2ensite site83.test.conf
And reload apache:
sudo systemctl reload apache2To make sure that our system knows the names of our test pages, we will modify
/etc/hosts
and add this line:
127.0.0.1 localhost site74.test site82.test site83.testIn /var/www/ folder
create the following subfolders for our test domains:
mkdir /var/www/site74.test
mkdir /var/www/site82.test
mkdir /var/www/site83.test
We create them without sudo, using a user that also runs PHP scripts, in our case jan and insert a PHP file index.php into each of them, which will contain:
<?php
echo phpinfo();
?>
Every time we make a change to the settings (e.g. php.ini, etc.) we restart both apache and fpm
sudo systemctl restart php8.3-fpm
sudo systemctl restart apache2
Then enter the following URLs into the address bar one by one:
site74.test

site82.test

site83.test

Conclusion
By following these steps, you can successfully set up a LAMP stack with multiple PHP instances on Ubuntu/Kubuntu 23.10 Linux in 2024. This configuration allows developers to work on different PHP versions simultaneously for their development needs.
In the ever-evolving world of Joomla content management system (CMS), having a robust and versatile ecommerce solution is imperative to cater to the diverse needs of website owners. Phoca Cart, a modern ecommerce suite deeply ingrained in the Joomla CMS framework, emerges as a powerful and feature-rich option for online stores. On the other side of the spectrum, YOOtheme, renowned for its Joomla support, is a highly regarded theme and template provider that seamlessly integrates with Joomla, empowering users to create visually stunning websites. The recent integration of Phoca Cart with YOOtheme has brought about a synergy that further enhances ecommerce capabilities within the Joomla environment.
Understanding Phoca Cart
Phoca Cart is an innovative and feature-packed ecommerce extension designed for Joomla. It stands out by aligning itself with the Joomla CMS framework, ensuring a seamless and intuitive user experience. This modern ecommerce suite boasts a comprehensive array of features, making it an ideal choice for online businesses looking for a powerful ecommerce solution within the Joomla ecosystem.
YOOtheme: Enhancing Joomla with Style and Functionality
YOOtheme, a leading theme and template provider, offers exceptional support for Joomla. With a focus on both style and functionality, YOOtheme provides beautifully designed templates that cater to the aesthetic demands of modern websites. Its unique approach to design and intuitive user interface have garnered a significant user base within the Joomla community. YOOtheme’s templates are built on the foundation of UIkit, a lightweight and modular front-end framework, aligning perfectly with modern web development practices.
Phoca Cart and YOOtheme: A Perfect Match
The integration of Phoca Cart with YOOtheme paves the way for a seamless and harmonious ecommerce experience. Phoca Cart is designed to generate output in either Bootstrap or UIkit, making it inherently compatible with YOOtheme, which is based on the UIkit framework.
1) Basic Support with UIkit Rendering
Phoca Cart seamlessly integrates with YOOtheme by rendering its output in UIkit. This foundational level of support ensures that the ecommerce functionalities of Phoca Cart align with the design aesthetics of YOOtheme.
2) Tailored CSS Display
Phoca Cart offers users the ability to configure additional CSS options that specifically cater to YOOtheme templates. This customization allows for a more cohesive and integrated look when integrating Phoca Cart with YOOtheme-based websites.
3) Flexible Icon Display
Icons within Phoca Cart can be customized to match the design preferences of YOOtheme-based websites. Users have the option to choose between font or SVG icons, providing flexibility in design and visual representation. SVG icon set can be easily changed by template override. See: Changing SVG icons using template override.

Extensions for Seamless Integration:
Phoca Cart extends its capabilities for YOOtheme integration through two dedicated extensions:
4) PCuikit Extension
PCuikit is an extension tailored for Phoca Cart in Joomla. It is designed to seamlessly integrate with Phoca Cart, aligning with the UIkit framework and ensuring a flawless ecommerce experience.
PCuikit integrates the powerful Phoca Cart ecommerce platform for Joomla with the versatile YOOtheme Pro framework. With this integration, web designers and agencies can now leverage YOOtheme Builder's full potential to create visually stunning templates for various Phoca Cart views.
PCuikit supports templating for the following Phoca Cart views:
- Categories view
- Category view
- Product view.
This integration is a game-changer for businesses looking to elevate their online stores' appearance and functionality.
See: PCuikit
5) Yootheme PhocaCart Bridge
Yootheme PhocaCart Bridge is a bridge that links YOOtheme Pro Page Builder with PhocaCart. This integration offers a front-end, 'drag and drop' layout builder for PhocaCart entities, facilitating a dynamic and customizable ecommerce experience within the YOOtheme Pro environment.
See: Yootheme PhocaCart Bridge
6) Template Overrides for Enhanced Display
Phoca Cart includes template overrides for various modules, such as:
- Phoca Cart Cart module
- Phoca Cart Currency module
- Phoca Cart Wishlist module
- Phoca Cart Compare module
- Phoca Cart Search module.
These overrides ensure seamless integration and optimal display, enhancing user experience and functionality. These modules' content can be displayed in dropdown or offcanvas menus, providing versatile options for showcasing ecommerce elements.

See: Phoca Cart template overrides
See: Phoca Cart template overrides documentation
The seamless integration of Phoca Cart with YOOtheme underscores the commitment to providing users with a cohesive ecommerce solution within the Joomla CMS. By aligning design elements and functionality, this integration aims to enhance the ecommerce experience, enabling website owners to create visually appealing online stores while leveraging the extensive features of Phoca Cart. With the combined power of Phoca Cart and YOOtheme, Joomla users can now elevate their online businesses to new heights, achieving a perfect harmony of aesthetics and ecommerce capabilities.
See: YOOtheme Pro
Quick instructions
1) Install Joomla CMS
2) Install Phoca Cart (component, module package, etc.)
3) Install Phoca Cart template overrides - e.g. Overrides - YOOtheme OffCanvas
4) Install YOOtheme PRO
5) Set YOOtheme as the default template
6) In Phoca Cart options, set the parameters Theme: UIkit, Icon Type: SVG, Load Specific CSS: YOOtheme
7) Set the position of Phoca Cart modules (Cart, Search, Compare, Wishlist, Currency) e.g. to "header" position
8) Create categories, products, etc. in Phoca Cart
9) Create a menu link to Phoca Cart (preferably to Categories view).
If you are not sure about something or need more detailed information, check the documentation pages or ask in the Phoca forum.
Phoca Cart - YOOtheme - categories view:

Phoca Cart - YOOtheme - category view:

Phoca Cart - YOOtheme - product view (mobile)

Phoca Cart - YOOtheme - checkout view:

- Why Your Google Ads Are Not Displayed on Your Website
- Phoca Restaurant Menu: Joomla vs. WordPress - Choosing the Right CMS for Your Restaurant's Needs
- Top 5 Featured Payment Methods for Phoca Cart
- How to display Phoca Gallery images in module position with help of Phoca Gallery plugin
- How to install Joomla child template


